BLACKMAILLE
Part 92 - How-To: Demo Boards, Pt.3
by Lord Thomas the Black
BLACKMAILLE
How-To: Demo Boards, pt 3
Welcome back to another edition of
Blackmaille! Last month, we continued our talk about how to enhance your SCA or
renfest demonstrations with demo boards. This month, we’ll attach our demo
pieces and labels!
Tools/Materials Needed:
1 pr needle-nose pliers
1 tube rubber cement
1 sm expendable paintbrush
1 drill (or Dremel tool) –w- 1/16” drill bit
1 sm spool 20g wire
Display pieces
Labels (see last month’s article)
Craft felt
Spray adhesive
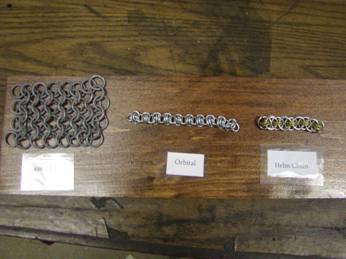
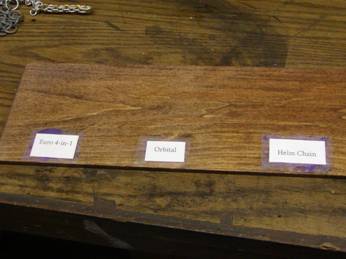
Now that the demo pieces and labels are done, time to start attaching everything to the boards. Take your stained/urethaned boards, and lay out the display pieces and labels how you want them. Arrange everything so that the labels are visible, it’s clear which pieces go to which labels, and the labels themselves are legible. Make sure everything’s how you want the finished boards to look.
Next, one at a time, turn your labels face-down on your workbench and put a small amount of rubber cement on the bottom, spreading it evenly with a cheap paintbrush you don’t plan to use again. When the glue is spread evenly, carefully turn the label back over and put it on the demo board where it will go. You want to make sure you don’t move it around much, or the cement will show under the edges of the label. Repeat this process until all your labels are fixed to the boards.
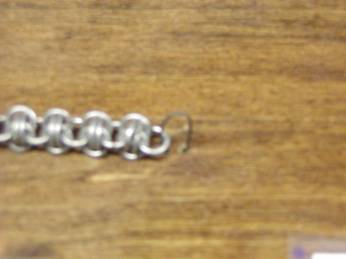
Now, to attach the demo pieces to the boards, we’re going to drill tiny holes next to the pieces themselves, and run wire through the board, tying them down (kind of like how action figures are packaged, with all those twist-ties). Take a pencil or pen and mark next to your demo pieces, one hole on either side of a ring on each corner.
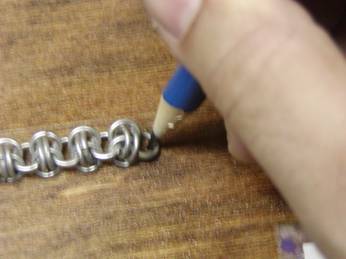
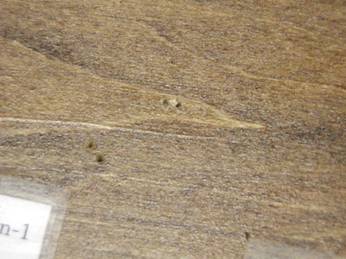
You can get away with two holes on each end of a chain weave, instead of four. Cut short (1 – ½”) pieces of 20g wire, one for each pair of marks. Now, using our drill (or a Dremel tool, which works better), drill a hole on each mark you made.
For each corner of a given piece, bend one of the short pieces of 20g in half, and run the ends through the board on either side of a ring in the piece, “stapling” it to the board.
Where the wire protrudes from the bottom of the board, grab both ends with your needle-nose pliers and twist them together. Give them several turns, firmly attaching the piece to the board.
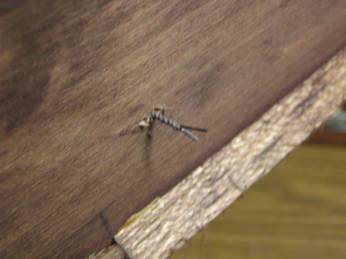
Clip off the excess ends and bend the rest down so they’re flush with the bottom of the board. Repeat this process for each piece on the board, then again with however many boards you’re making.
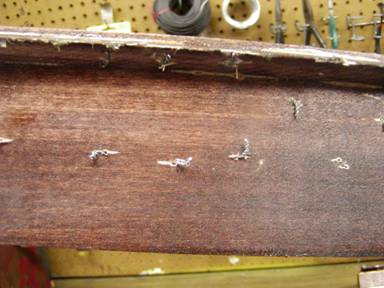
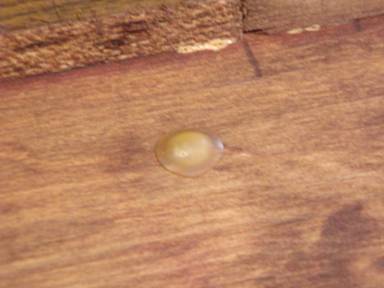
Note that the cut-off ends of the wire may be very sharp, and it may be difficult to get the wire twist completely flush with the bottom of the board. The result can be sharp ends that can poke or cut your fingers as you handle the boards. There’s two ways you can handle this: The simplest solution to this is to coat these ends with rubber cement. Just dab it on thick, and when it dries, it’ll leave a safe rubber coating on those sharp points.
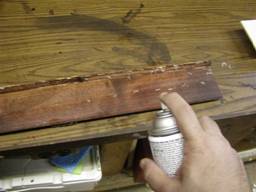
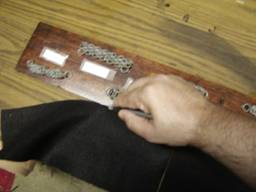
A nicer-looking alternative is to spray the bottom of your boards with spray adhesive, then lay down a sheet of craft felt. This can be found at most hobby stores (Hobby Lobby, Michael’s, etc) for cheap, and is nice and thick, as well. Cover the entire bottom of the board with felt, and trim off the excess.
So there you have it! Now your demo boards are done! Next month, we’ll look at how our boards fit into our demo, and discuss the impact they’ve had on the public’s understanding of our craft. In the meantime, thanks for joining us for another month of Blackmaille! As usual, any questions, comments, hate mail or fan mail can be sent to me at:
Thomas Beckett
13628 Belmead Ave
Grandview, MO 64030
Or you can email me at: tbeckett1@kc.rr.com
See you next month!
Back to the Blackmaille Webpage
Back to the Cúm an Iolair Information Webpage
Articles: ©2003, 2004, 2005, 2006,
2007, 2008, 2009, 2010, 2011
Thomas Becket/Lord Thomas the Black
e-mail questions & comments to:
tbeckett1@kc.rr.com
Hosting: ©2003, 2004, 2005, 2006, 2007, 2008,
2009, 2010, 2011
Ron Knight/Modar Neznanich
e-mail: modar@everestkc.net