
Armor for Women
[Page 2]
Armor for Women
[Page 2]
The materials you would need to start with are these: leather (or heavy duty cloth), metal or plastic for plates, and rivets. When you are done, you will need to attatch buckles and straps to the sides. I find that leather dog collars are GREAT for this if you do not know how to make them.
This type of armor is easy and pretty self explanatory. I have also heard of it being made with pockets in the canvas and the plates being slipped into the pockets (thereby making it easy to wash.)
Once you have your plastic clean and ready to work, set it aside. It's time to talk safety. These are in no particular order. First, when heated and melted, plastic lets off toxic fumes. Make sure your kitchen/house/whatever is Well Ventilated. That means open the windows and the doors and turn on the box fan. Second, always test your plastic (as some are thicker than others) in the oven. Line your oven with tin foil. This will make cleanup easier should there be a melting problem . Lastly, an oven temp of about 400 to 450 is usually just right for most plastics, but I have heard some use 300.
"Cut a rough pattern from cloth (try to make it a little too big as you can cut it down but can't glue it back if it's too small) and hold it up to you. Trim the cloth to fit you nicely and put it to the plastic and copy the pattern onto it.
On the side, make sure you have some bath towels.
Put the cut piece of plastic into the oven until it reaches a malleable point. It'll smell terrible. Make sure your ventilation is good. Put the towels into the heavy sweatshirt (that you are wearing) and put the plastic to it, molding it to your body." -Anonymous
Put the wire to your body and mold it to your shape. Then put the plastic over it and tie it with heavy cotton cording. Put it in the oven (again at a tested temp) and let it melt into the form of the mold. When you think it is ready, take it out of the oven and press any non-uniformities into the mold (You may need the assistance of an upside down bowl for supporting your mold while you push the plastic onto it.)"-Gunnora Hallakarva
For any kind of breastplate, you may choose to make the back protection the same, or you may choose to use leather or cloth with plates.
 |
 |
 |
 |
 |
Ok, to start, you'll need a brown paper bag (or large construction paper, or something big and paper) to make a pattern for a breastplate that will fit you. Cut out a neckline and arm lines that are comfortable for you (this will make it look roughly like a tank top shape.) and put it up to you (a friend is always helpful for any armoring). You will notice that the paper is flat and you are not. Wrap the paper around your sides. There should be some "extra paper" right to the outsides of your chest. Pinch the extra paper and fold it down. You now know where to put the "dart" in your pattern. (If you are not sure what I mean by dart, ask a local tailor or seamstress.) :)
Cut the bottom of the breastplate along a line just above your bellybutton. About an inch or less should do fine. You need to be able to bend forward in your breastplate.
So now you should have a piece of paper lying flat in front of you with some
folds on the sides of where the chest is. There should be three lines for each
dart. If not, then know that the two lines that are there are only half of the
triangle you need to cut. After it is cut out, trace and cut the pattern to your
unwaxed leather.
When that is done, add any color you would like to have when it is finished. The waxing process will even out the color if there is light/dark spots.
In a disposable (Because you won't want it after it's done) large pan, gently melt enough paraffin wax (I suggest starting off with about 4 to 5 pounds and see how much you need from there) to comfortably cover the leather. I stress gently because wax is flammable. If you try to melt it too quickly, you run the risk of fire. For every pound of wax that you have, you will also need a pound of Stearic Acid-I'm not exactly sure of the spelling- (candle hardener) in the mix. You can find this at craft stores that sell candle making supplies or at specialty candle stores. This will make the paraffin hard to melt again once your leather has soaked it all up.
When the wax has been melted to look like water and the stearic acid has been added, then put your leather into the pan and let it soak. (You can do this in sections if the leather is larger than the pan.) When it stops bubbling (this is a judgment call, it's your decision when it's good enough) then place it on newspaper to dry/harden. When you do this, have some string handy to tie around the plate to harden roughly into the shape you want. When it's hard, you can adjust smaller stuff easily.
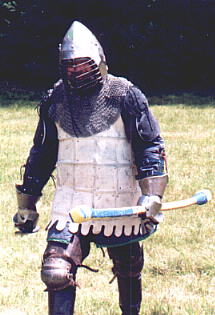
After it's dry and hard, use an awl to make any sewing holes (the darts, specifically) and lace/sew the darts closed with sinew. The wax makes it easier to cut holes. (Which is why they never waxed their leather in the middle ages.) You now have a class "A" breastplate for SCA combat. Add the back and buckles/straps. I made my breastplate with this method in about three or four hours.
For a breastplate, find a good sized piece of metal (the scrap-yard is a good place to look.. you'll want to look for a large flat piece of 16 gage or so.)I've seen elevator doors, old metal shelves, use your imagination, there is a lot out there. When you have found your piece, take off any extra parts (such as old rivets, etc) and maybe clean any yuck off of it. (Yuck is an industry term.. ha ha)
Now look up to the waxed leather section on how to make a pattern. It will be the same for your metal pattern, but do NOT cut out the dart! Instead, you will cut just the bottom line of the dart. Trace your pattern- including the dart- onto your metal. Cut it out.
Clean the edges of the now-cut metal. That is, grind the edges so that they are not sharp. Then, put a gentle bend into the metal from top to bottom as far in as the dart goes on either side. You should now have what looks from the top like three sides of a square. (I want to emphasize the Not Sharp bends here.) Now cut the bottom line of the dart and bend the top half back so the top line meets the cut. Drill and rivet into place.

*(On a personal note, however, I always make my body armor with shoulder
buckles and side buckles. This way if I am hurt in any way, my armor will be
easily removed by whoever is helping. If you were to unbuckle all of the straps
on my armor you would have a separate pauldron, gorget half, backplate,
frontplate, etc, etc, etc.)
Recently, I realized just how long I've been fighting and armoring in the SCA. Then I thought about all of the different suits of armor I've made for myself over the years.
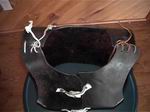
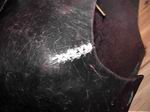
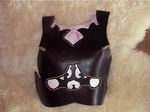
Every one was functional without being very decorative, and I was in the mood for something different. So I bought some leather (I STRONGLY suggest Demar's in Lewiston, Maine. Very good prices, very good quality and no shipping charges in the U.S.) and started a new kit. Here's a pic of the breastplate (when it was only 75% done...). It had some extra wax still on it, so there's some color differences, but I can melt the extra wax off with a hairdryer or it will fall off on its own as I fight.
| Group Links The SCA Homepage Armour and Fighting Links Armor and
Weapons Supply Links
|